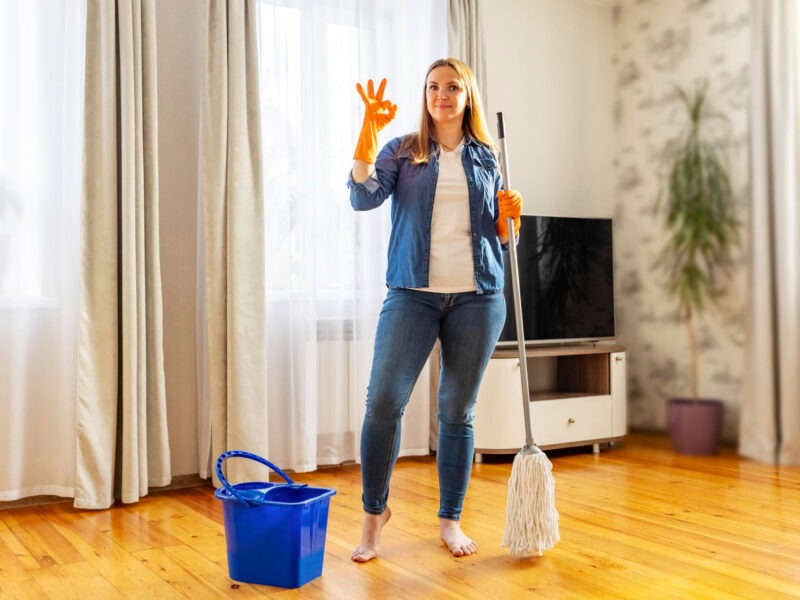
Keeping your garage floor clean is crucial for maintaining both its functionality and appearance. Here, we offer an exhaustive guide to help you effectively clean your garage floor, tackle tough stains, and ensure the longevity of the flooring. Follow these steps to achieve a pristine garage environment.
Preparing Your Garage for Cleaning
Clear the Floor for an Unobstructed Cleaning Process
Preparing your garage for cleaning is an excellent way to ensure a thorough job. Here’s a step-by-step guide to help you clear the floor and prepare for an unobstructed cleaning process:
- Remove All Items from the Floor: Start by taking everything off the garage floor. This includes tools, boxes, bikes, and any other items that may be stored there. You might want to temporarily place these items in the driveway or another safe area while you clean.
- Organize as You Go: As you clear the floor, it’s a good time to sort through your items. Decide what to keep, donate, or throw away. This can help reduce clutter and make it easier to keep the garage tidy in the future.
- Clean from Top to Bottom: Before you focus on the floor, clean the ceiling and walls first. Dust and cobwebs tend to accumulate in these areas and can fall onto the floor during cleaning. Use a broom, duster, or vacuum with a hose attachment to reach these higher surfaces.
- Sweep and Vacuum the Floor: Once the upper areas are clean, sweep the floor to collect loose dirt and debris. Follow up with a thorough vacuuming, especially in the corners and along the edges where dust tends to gather.
- Address Stains and Spills: Inspect the floor for any oil stains or spills that need special attention. You can use commercial cleaners designed for garage floors, or home remedies like baking soda and vinegar, to treat these spots.
- Consider Deep Cleaning Solutions: For a deeper clean, consider using a pressure washer or a floor buffer equipped with a scrubbing pad. These tools can help remove stubborn dirt and grime, leaving your garage floor looking refreshed.
- Reorganize and Return Items: Once the floor is clean, think carefully about how you return items to the garage. Use shelving units, hooks, and bins to keep things off the floor as much as possible. This not only helps keep the area tidy but also makes future cleanings easier.
By following these steps, you’ll ensure that your garage is not only clean but also well-organized, making it a more functional and pleasant space.
Eliminating Loose Dirt and Debris
Eliminating loose dirt and debris from your garage floor is crucial for a thorough clean-up. Here’s how you can effectively tackle this step:
- Choose the Right Tools: Start with the proper equipment. A stiff broom is ideal for sweeping up larger debris, such as leaves, dirt clumps, and small pebbles. For finer particles like dust and sand, consider using a shop vacuum. These vacuums are more powerful than regular household vacuums and can handle the heavier and coarser debris typical in garages.
- Sweep Thoroughly: Begin by using the stiff broom to sweep the entire floor. Pay special attention to the corners and edges of the garage, as these areas often accumulate the most debris. Use broad, steady strokes to push the debris toward the center of the garage or toward the main door.
- Vacuum the Floor: After sweeping, go over the floor with a shop vacuum. This will pick up any remaining dust and smaller particles that the broom couldn’t capture. Make sure to use the appropriate attachments for the vacuum to get into tight spaces and along edges.
- Dispose of Debris Properly: Collect all the debris and dispose of it properly. Depending on the type and amount of waste, you might need to use heavy-duty garbage bags or take it to a disposal facility.
- Check for Missed Spots: After the initial cleaning, take a moment to inspect the floor for any areas that might have been missed. It’s not uncommon to overlook small patches during the first pass, so a quick re-check can ensure that nothing is left behind.
- Prepare for Wet Cleaning: Once all loose debris is removed, your floor is ready for wet cleaning. The absence of loose particles will make mopping or scrubbing more effective and prevent the spread of dust.
By thoroughly removing loose dirt and debris first, your wet cleaning process will be much more efficient, leading to a cleaner and more pleasant garage space.
Mixing the Perfect Cleaning Solution
Creating an Effective Degreasing Solution
Mixing an effective degreasing solution for cleaning your garage floor can significantly enhance your cleaning results, especially if you’re dealing with oil spills or stubborn grease. Here’s how to create the perfect cleaning mixture:
- Select the Right Degreaser: Choose a high-quality degreaser that is known for its effectiveness. Products like Dawn Platinum Dishwashing Liquid or Simple Green are popular choices because they are formulated to cut through grease and grime efficiently. Both are also gentle on various surfaces, making them safe for most garage floors.
- Prepare Your Supplies: Gather a clean bucket, warm water, and the degreaser. Make sure your bucket is free of any residues that could interfere with the cleaning power of the degreaser.
- Mix the Solution: Fill the bucket with warm water. Warm water is preferable as it helps the degreaser to dissolve and activate more quickly. Follow the instructions on the degreaser’s label for the appropriate amount to use—typically, this will be a few ounces per gallon of water.
- Stir Thoroughly: Use a stick or a large spoon to stir the solution well. Ensure the degreaser is completely mixed with the water. A well-mixed solution will provide the best cleaning results.
- Test the Solution: It’s a good idea to test the solution on a small, inconspicuous area of your garage floor first to ensure that it does not discolor or damage the surface.
- Use as Needed: Once your degreasing solution is ready, use it to mop or scrub the garage floor. Depending on the extent of grease and grime, you might need to let the solution sit for a few minutes to break down the grease effectively.
- Rinse Well: After scrubbing, rinse the floor thoroughly with clean water to remove any residual cleaner. This step is important to prevent any slippery spots on your garage floor.
Creating and using this degreasing solution effectively will help you achieve a cleaner, more grease-free garage floor.
Application of the Cleaning Solution
Applying your cleaning solution correctly is key to effectively removing oil and grime from your garage floor. Here’s how to do it:
- Prepare Your Mop and Bucket: Make sure your mop is clean and in good condition. A mop that’s too worn may not be effective. Fill your bucket with the mixed degreasing solution you prepared earlier.
- Start with Small Sections: It’s easier and more effective to focus on small sections of the floor at a time. This approach allows you to manage your cleaning efforts without letting the solution dry out, which can happen if you cover too much area at once.
- Apply the Solution: Dip your mop into the cleaning solution, wring it out slightly so it’s not dripping excessively, and apply it generously to the first section of the floor. Ensure the area is fully covered with a thin layer of the cleaning solution.
- Let It Soak: Allow the solution to sit on the floor for about 10-15 minutes. This soaking period is crucial as it gives the degreaser time to break down the oil and grime. Avoid letting the solution dry completely, as a damp surface enhances the cleaning action.
- Scrub If Necessary: For areas with heavy staining or buildup, use a scrub brush to agitate the floor during or after the soak time. A stiff-bristled brush can help in dislodging tougher grime.
- Rinse the Section: After the soaking and scrubbing, mop up the dirty solution with clean water. It’s important to remove all the cleaning solution along with the lifted dirt and grease.
- Repeat for Other Sections: Move on to the next section of your garage floor and repeat the process. It’s a good practice to work your way towards the exit of the garage to avoid stepping on the cleaned areas.
- Final Rinse and Dry: Once the entire floor has been cleaned and rinsed, give the garage floor one final rinse with clean water. If possible, use a squeegee to remove excess water, helping the floor dry faster and prevent any slip hazards.
By applying the cleaning solution in controlled sections and allowing it to soak, you enhance its effectiveness, resulting in a cleaner and more grease-free garage floor.
Scrubbing the Floor
Scrubbing your garage floor effectively after applying a degreasing solution is crucial for removing tough stains and ingrained dirt. Here’s a step-by-step guide on how to do it properly:
- Choose the Right Brush: Use a nylon-bristled brush for scrubbing. Nylon is tough enough to remove grime without damaging the concrete. Avoid using metal brushes as they can leave metal fragments behind, which might rust and stain the concrete.
- Begin Scrubbing: After letting the cleaning solution soak into the floor for the recommended 10-15 minutes, start scrubbing the area. Apply firm, consistent pressure to scrub the surface thoroughly. For large floors, consider using a brush with a long handle to make the job easier and to avoid strain on your back.
- Focus on Stained Areas: Pay extra attention to areas with significant oil stains or grime buildup. These may require more vigorous scrubbing or a second application of the cleaning solution to fully break down the grease.
- Work in Sections: Continue to work in small sections, similar to when you applied the cleaner. This method ensures that the cleaning solution doesn’t dry on the surface before you have a chance to scrub it.
- Rinse Each Section: After scrubbing each section, rinse the area with clean water. Removing all traces of the degreaser and lifted dirt will prevent them from settling back into the pores of the concrete.
- Inspect and Repeat if Necessary: Once you have scrubbed and rinsed the floor, inspect it for any remaining stains or dirt. Some areas might need a repeat treatment. Apply more cleaning solution, let it soak again, and scrub as needed.
- Dry the Floor: After the final rinse, remove excess water with a mop or squeegee to help the floor dry faster. This step is particularly important in preventing slip hazards and ensuring the floor is ready for use.
Using a nylon-bristled brush and following these steps will help you achieve a clean and well-maintained garage floor without the risk of damaging the concrete or causing rust issues.
Rinsing the Floor
Rinsing the floor properly after scrubbing is crucial to remove all cleaning residues and prevent them from attracting more dirt. Here’s how you can effectively rinse your garage floor:
- Choose Your Equipment: If available, use a pressure washer for rinsing as it provides a powerful and efficient clean. A garden hose with a spray attachment is also effective, especially if you have a nozzle that allows you to adjust the water pressure.
- Prepare the Area: Before you begin, ensure that any items sensitive to water, like tools or electrical equipment, are moved away or covered. Also, make sure that the garage door is open to allow water to exit.
- Start from the Back: Begin rinsing at the back of the garage, the area furthest from the entrance. This helps you avoid standing in a puddle of dirty water and ensures that you are pushing the dirty water out as you go.
- Use Consistent Pressure: Whether using a pressure washer or a hose, maintain consistent pressure to ensure thorough rinsing. Adjust the nozzle to a medium or high setting to effectively remove soap and debris.
- Overlap Your Strokes: When using the hose or pressure washer, overlap your strokes to make sure no spots are missed. Pay special attention to corners and edges where residues might accumulate.
- Push All Residue Out: Gradually work your way towards the garage entrance, pushing all water and cleaning residues out. This method ensures that the entire floor is cleaned and that no soap or dirt remains on the surface.
- Inspect and Touch Up: After rinsing the entire floor, take a moment to inspect the area. If any spots were missed or if there’s still some residue, go over these areas again with the hose or pressure washer.
- Allow to Dry: Once rinsing is complete, allow the floor to dry thoroughly. You can speed up the drying process by using a squeegee to remove excess water or by setting up fans to circulate air more effectively.
Rinsing with care and attention ensures that your garage floor is not only visually clean but also free from any residues that could attract dirt or cause slippery conditions.
Drying the Floor
Drying your garage floor thoroughly after cleaning is essential to prevent any potential issues like mold, mildew, or slipping hazards. Here are some steps and tips to ensure the floor dries effectively:
- Use Natural Ventilation: Open all doors and windows to allow for natural air flow. This helps to speed up the drying process by increasing air circulation.
- Remove Excess Water: Before letting the floor air dry, use a squeegee to remove as much water as possible. Push the water toward the open garage door or a drain if one is available.
- Use Fans for Air Movement: Set up fans at strategic locations to facilitate air movement across the floor. Positioning fans at entrances or using a high-velocity fan can significantly reduce drying time.
- Check Humidity Levels: If the weather is particularly humid, it may take longer for the floor to dry. In such cases, using a dehumidifier inside the garage can help extract moisture from the air, aiding in faster drying.
- Avoid Replacing Items Too Soon: Wait until the floor is completely dry before moving items back into the garage. This is important to prevent trapping moisture beneath objects, which can create ideal conditions for mold and mildew to develop.
- Inspect the Floor: Periodically check the drying progress. Touch different areas of the floor to ensure they are dry to the touch. Pay special attention to corners and edges, which may dry more slowly.
- Timing: Depending on the methods used and the ambient conditions, drying can take several hours. Planning your cleaning on a warm, sunny day can help expedite this process.
By following these steps, you can ensure your garage floor is fully dry and safe from moisture-related damage before you replace items and resume using the space as usual.
Addressing Specific Stains
Oil and Grease Stains
Addressing oil and grease stains on your garage floor can be tackled effectively with a few specific steps. Here’s how to manage these stubborn stains:
- Absorb Excess Oil: Begin by applying a generous amount of kitty litter to the oil stain. Kitty litter is highly absorbent and will soak up a lot of the oil from the surface. Make sure the kitty litter completely covers the stain.
- Let It Sit: Allow the kitty litter to sit on the oil stain for 24-48 hours. The longer it sits, the more oil it can absorb, making the cleaning process easier.
- Sweep Up the Kitty Litter: After the sitting period, sweep up the kitty litter. Dispose of it properly, considering it’s now contaminated with oil.
- Apply a Concentrated Degreaser: Next, prepare a concentrated degreaser solution. Use a stronger concentration than you might for general floor cleaning to tackle the tough residue left by the oil. Apply this solution directly to the stained area.
- Scrub the Stain: Using a nylon-bristled brush, scrub the area thoroughly. The degreaser will help break down the remaining oil and grease, making it easier to remove. Ensure you scrub vigorously to get deep into the pores of the concrete where oil tends to seep.
- Rinse Thoroughly: After scrubbing, rinse the area thoroughly with clean water. Use a hose or a bucket of water to wash away all traces of the degreaser and loosened oil. If you have a pressure washer, it can be very effective in this step to ensure all cleaning agent residues are removed.
- Dry the Area: Allow the cleaned area to air dry completely or use a clean, dry mop to absorb excess water. This helps prevent slipping and further soil accumulation while the surface is still damp.
- Inspect and Repeat if Necessary: Once the area is dry, inspect the stain. If some residue remains, you may need to repeat the process with the degreaser and scrubbing until the stain is fully removed.
By following these steps, you can effectively remove oil and grease stains from your garage floor, restoring it to a cleaner and more visually appealing state.
Mold and Mildew
For mold or mildew, a solution of chlorine bleach diluted with water can be effective. Apply it to the affected area and let it sit for up to 30 minutes before rinsing. Always wear protective clothing and eyewear when working with bleach.
Rust Stains
Treat rust stains with an oxalic acid-based cleaner. Apply according to the manufacturer’s instructions, scrub with a nylon brush, and rinse well. It may be necessary to repeat this process for stubborn stains.
Additional Tips for Different Types of Flooring
- Epoxy Floors: Regularly sweep and mop up spills quickly. Avoid soap-based cleaners.
- Untreated Concrete: Can be cleaned like outdoor concrete areas. Use a general all-purpose cleaner and a scrub brush.
- Painted/Stained Concrete: Avoid harsh methods like power washing that can damage the finish.
- Polished Concrete: Use a pH-neutral polished concrete cleaner and mop lightly.
- Vinyl Tile: Easily cleaned with mild detergent; ideal if no vehicles are parked on them.
- Rubber Tile: Clean with all-purpose cleaner; vulcanized options are best for garages with vehicles.
This detailed approach to cleaning your garage floor will help maintain its condition and ensure it remains a functional and appealing part of your home. By regularly following these steps, you can keep your garage in top condition, making it a cleaner, safer, and more enjoyable space.